

Welcome back to our series on “How to get away with phishing,” where we’re diving deep into the world of phishing. In part 0, we covered the preliminary research. In this part, we’re going to use the research you’ve done to craft the perfect lure.
Step 1: The Initial Hook - Email
The research you’ve done in part 0 comes in handy here - tailoring your message to and referencing specific things about your target makes an effective hook, and makes it more likely that they’d engage with your email instead of throwing it straight into the junk folder.
Key parts of a custom lure
These are some details that are useful for crafting a targeted phishing email:
- Professional Role and Responsibilities: This helps you craft an email that appears related to their daily tasks and lower their defenses.
- Example: If they’re in finance, you can create an email related to financial reports or invoices.
- Recent Activities or Interests: Has the target recently attended a conference, been involved in a project, or mentioned a particular interest on social media? Referencing these can make the email more interesting to the target, and also more organic/authentic.
- Personal Connections: Knowing who the target regularly interacts with allows you to impersonate someone they trust, like a manager, coworker, vendor or a frequent business contact.
- Company Tech Stack: If the company uses specific software/platforms, you can tailor the email to reference these tools.
- For example: If the company uses Slack, you can send an email like “You have been invited to a new Slack group” and get the user to click on the fake “invitation”.
- Internal Processes: If you know the company’s typical workflow, such as how they handle IT requests, expense approvals, or document sign-off, you can mimic these processes in your email to make it seem like a routine task.
- For example: you can impersonate the IT department and send out an email like “IT Request: Urgent Action Needed” to an end-user.
Assembling your lure
Now that you’ve gathered and analyzed the relevant information, it’s time to craft the email. Here’s are a few steps, along with some examples:
- Subject Line: Grab the target’s attention by referencing something specific to their work or interests. Your target is more likely to open an email that looks like it’s specifically for them, instead of a generic spam message. For example:
- “Quarterly Budget Report Review – Action Required”
- “Invitation to Exclusive Webinar on [Target’s Industry or Interest]”
- “Urgent: Follow up on [Target’s Project]”
- Content: Directly address something the target is likely involved or interested in. Use the information you have gathered before to create a narrative that seems relevant and urgent.
- “We’ve noticed some discrepancies in the latest financial report related to [Specific Department or Task]. Could you please review the attached document and provide your feedback by [Specific Date]?”
- “I hope you enjoyed the recent [Conference Name] – the keynote on [Topic] was particularly insightful.”
- “As discussed, here’s the proposal for the [Project Name]. Please review the attached document and let us know if any changes are needed before the final submission.”
- Call to Action: Finally, it’s time to make your target act - to click a link, download an attachment, or just reply to the email. The classic tricks apply, to convince your target that the action is critical/necessary/urgent:
- “Please review the attached invoice and approve it by EOD to avoid any delays.”
- “Click the link below to access the secure document before it expires on [Specific Date].”
- Incorporating Links and Attachments: Of course, what phishing email is complete without the malicious payload? In fact, this part is so important, we’ll dedicate a whole other section to it.
Stage 2: Setting Up a Convincing Phishing Website
Ok, so you’ve managed to get the target to open the email and click on the link. All as planned.
Now is a pivotal moment - will the target proceed to submit their credentials into your phishing site and/or download your malware, or will they realize the ruse and back out (and possibly report your email to their pesky security team)?
We’ll walk through some steps on creating a website that would convince the most vigilant targets to part with their lovely credentials.
Step 1: Register a convincing domain name
Your domain name is going to be one of the first things to give you away. If you’re pretending to be Apple, your obviously-evil.xyz domain isn’t going to convince anyone. But apple.com is already taken! What do you do?
1. Use Similar-Looking Domain Names
One simple way is to register a domain that closely resembles the legitimate site you are trying to impersonate. For example:
- Misspelled Domains: Register domains with common misspellings of the original site, such as “microsotf.com” instead of “microsoft.com.”
- Homoglyphs: Use characters that look similar to the original ones, such as replacing the letter “o” with the number “0” (e.g. “g00gle.com”).
- Subdomains: Use subdomains that make the phishing site appear as part of the legitimate site, such as “login.microsoft-support.com” instead of “login.microsoft.com.”
2. Use Punycode to Impersonate Websites
Punycode is a way to represent Unicode characters in a domain name using ASCII. This allows attackers to create domain names that appear visually identical to legitimate ones, even though the underlying characters are different.
- Example: The letter “а” in Cyrillic looks almost identical to the Latin “a,” but they are different characters with different Unicode values. Using Punycode, you can register a domain like “xn—pple-43d.com,” which will render in a browser as “арple.com”.
Step 2: Set up TLS
You see that lock icon in the URL bar?
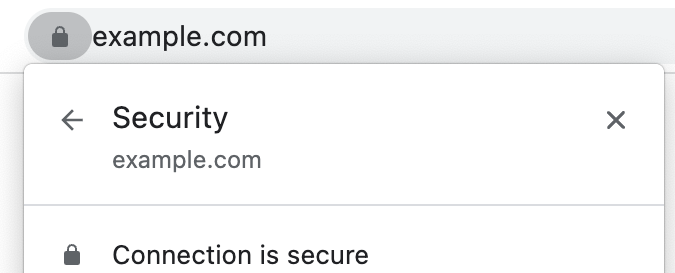
Most legitimate websites have it. If you want to look legitimate, you’ll need it too.
This part is quite simple, you just need to set up a TLS Certificate for your website - if you’re short on budget, you can even get it for free from Let’s Encrypt.
Stage 3: Content
Now for the actual meat of your website. The content. Your target isn’t going to put their precious credentials into any random page. If they think they’re going to apple.com, then the website’s gotta look like apple.com, or the alarm bells are going off.
Approach 1: Imitation is the highest form of flattery
The simple way is to just copy the website. Tools like HTTrack or SiteSucker can help you download an entire website. You can then inspect the files and extract relevant parts to build a copycat version of their websites.
You’ll need to adjust certain parts of the cloned website to make it work for your nefarious purposes, such as changing form submission fields to point to your own backend.
Bonus tip: When cloning websites, strip out any elements that aren’t essential to the phishing attack, such as complex scripts that might break or raise suspicions in the cloned website.
The above can be tricky, as many modern websites can be very complex and it can be time-consuming to go through all of the code, extract the relevant parts, and modify it to work for you. But what if you could imitate a website without having to copy any of their code?
Approach 2: Instead of imitating, try intercepting
Enter…Evilginx.
Evilginx is a man-in-the-middle (MITM) attack framework that acts as a proxy between the victim and the legitimate website. Unlike traditional phishing, which focuses on stealing usernames and passwords, Evilginx can intercept login credentials along with session cookies, which in turn can allow the attacker to bypass 2-factor authentication protection.
How it Works:
- Proxying Legitimate Websites: Evilginx forwards all traffic between the victim and the real site in real-time, making the phishing site indistinguishable from the legitimate one.
- Capturing Credentials and Session Tokens: As the user enters their credentials on the phishing site, Evilginx captures these details and forwards them to the legitimate website, intercepting the session cookie in the process. This session token allows the attacker to log into the victim’s account without needing MFA.
- Bypassing Multi-Factor Authentication: With the session token, the attacker can gain access to the target’s account even if they have MFA enabled.
Because Evilginx proxies the legitimate site, the content shown on the phishing site is nearly indistinguishable from the real one.
Stage 4: Testing - Eating your own fish food
You’ve put so much effort into your campaign; it would surely be a pity if it ends up flopping. So before you cast your lure, test it first:
- Send the phishing email to a test group to evaluate its effectiveness - Assess open rates, click rates, and whether the email triggers any security alerts.
- Check how well your phishing attempt bypasses common anti-phishing tools and spam filters. We’ll go into more detail on how to evade these checks in the next part of the series.
Tools like Gophish can help you simulate campaigns and analyze responses.
Conclusion
And that’s it! The lure is prepared, and in the next part of the series, we’ll explore how to deliver it effectively and ensure that your hook reaches the intended audience.